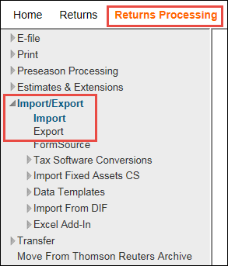
RS Import: Selecting Import
- To access the Import menu option, click Returns Processing > Import/Export > Import.
- The import page appears. The import type will default to the import type last used.
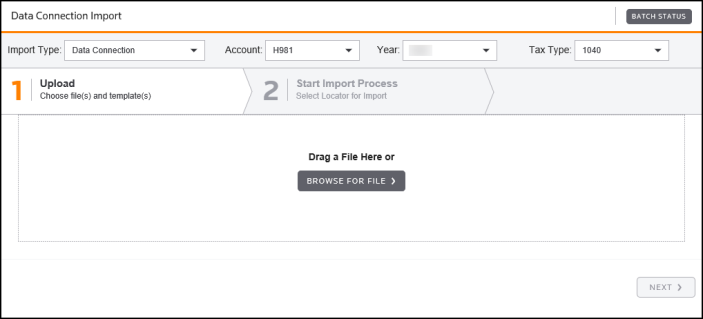
No other controls on the page are active. You cannot change or select any control until you select the import type.
- Select the desired import/export product on the Import Type: drop-down list. The drop-down list contains a list of available import/export products. Use the Batch Status button to access the status of previously launched Data Connection import jobs.
- You can select tax year and tax application to customize the criteria for import files.
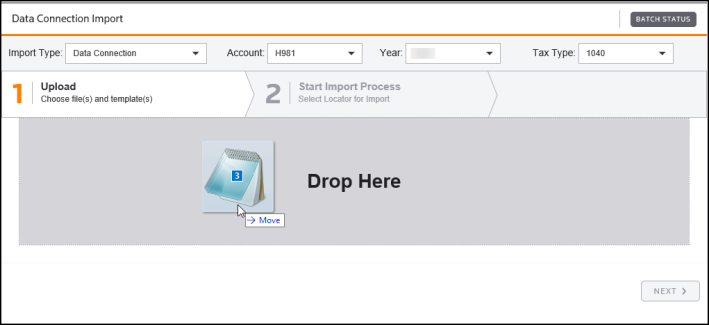
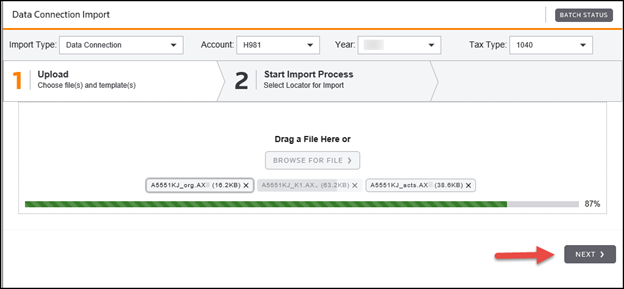
- After establishing the import file criteria (tax year and tax application), drag and drop the selected files from your workstation to the Import page.
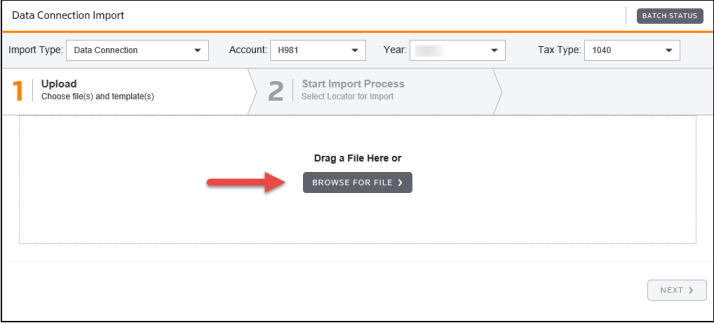
- Alternatively, click the Browse for File button to begin the import file selection process.
- The Open dialog appears.
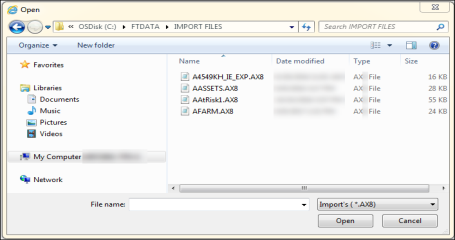
- Use the dialog navigation tree to select the location on your workstation or network that contains the import files. All files to be imported in a single batch must be in the same location (folder).
The Open command button remains inactive until a valid location is selected on the dialog. After you select a valid location, the command button becomes active. A valid location is one where one or more import files reside that meet the tax year and tax application criteria selected previously. Tax year and tax application designations are included in the import file filename extensions.
- A list of import file candidates (files in the specified location that meet the specified tax year and tax application criteria) appears in the Open dialog box.
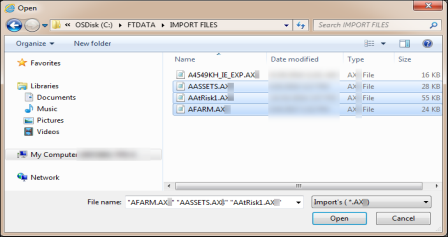
- When you have selected the files to import, click Open. The selected files will be listed in the pane of the import page. Click Next to proceed.
If an import file in the selected location does not have a correct Replacement Flag value in the header record, it will not be listed as an import candidate. In addition, import files that do not have a value in the Entity ID column will create a new tax return during the import. Entity ID is the column in which the locator number appears.
In the example below, a file without a locator number has been selected for import.
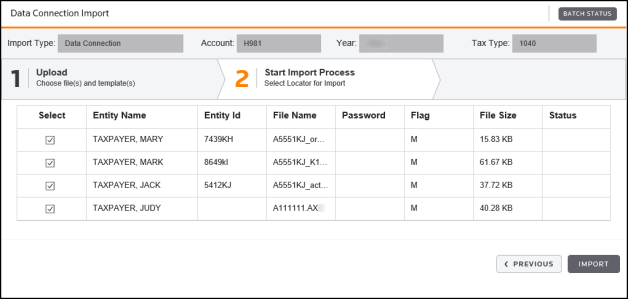
- To upload the selected import files from your workstation or network to the batch server, click the Import button.
The import files are uploaded to the batch servers by a Thomson Reuters ActiveX program named WebAttach. This program provides a completely secure transfer of these data files.
- A new import page is returned. This page shows the status of each import launched (far right side in the Status column). The normal status is Import Job Queued. If an issue exists with the import launch, the appropriate notation appears in the Status column.
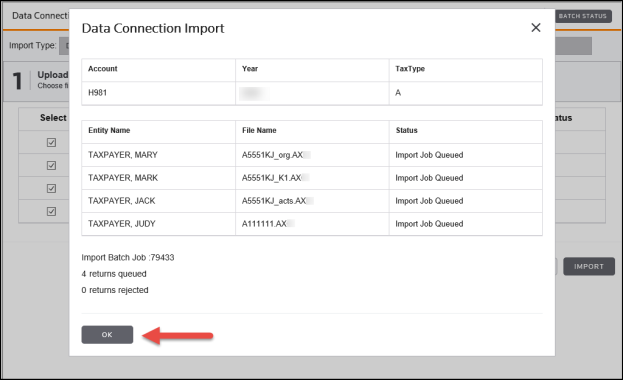
- Click OK. The main import screen shown below is returned.

Import/Export/rs_ie_operation_import_1.htm/TY2021
Last Modified: 10/15/2020
Last System Build: 10/18/2022
©2021-2022 Thomson Reuters/Tax & Accounting.
