General Requirements
Click here to download a PDF copy of this guide.
In e-filing your FBARs through our software, you will be using some of the same basic steps used when e-filing a tax return.
Organizer
- Complete and review your FBAR(s) within a return. Only one FBAR can be prepared in a return. Multiple financial accounts can be included on a single FBAR.
- Generate a validation file. In the e-file folder within the FBAR Organizer, generate the validation file. Rather than programming an extensive list of reject diagnostics, input errors and omissions are detected using the validation process. With an XML file generated for validation, errors are accessed through the View > Diagnostics > Efile XML Validations Errors > FBAR menu. Each error explains the specific item that must be completed, and double-clicking takes you to the specific field in the FBAR for correction. Repeat this process until all errors are eliminated.
- Create FBAR e-file and review using the e-File Viewer. After eliminating all errors through the validation process, create the FBAR e-file in the e-file folder within the FBAR Organizer. The e-File Viewer displays the contents of the FBAR. While the e-file that is transmitted to FinCEN is a text-based file, the e-File Viewer displays information as an XML file. The FBAR information can also be viewed as a PDF file.
Income Tax Home Page
- Submit the qualified FBAR e-file.
- In the Income Tax menu bar, select E-file > Submission.
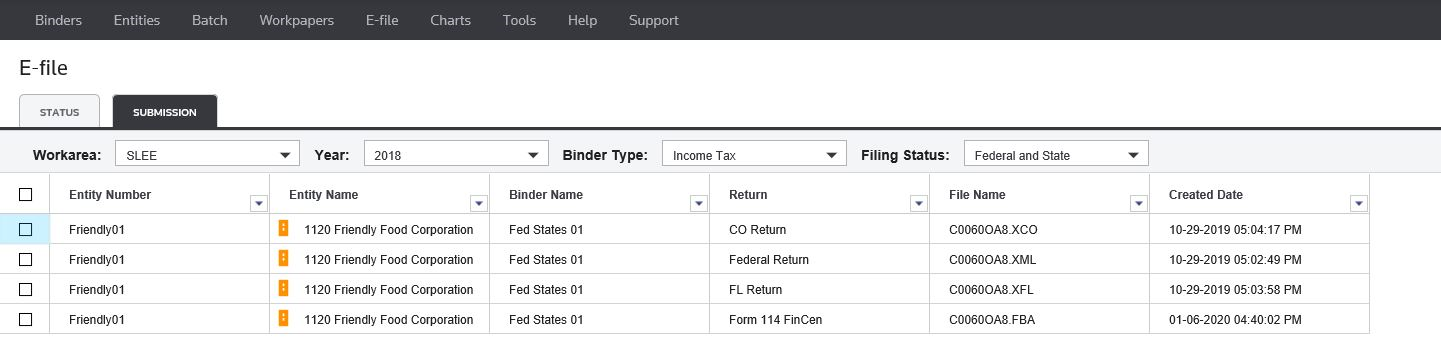
- Select the Workarea, Binder Type, Year, and Filing Status.
- Select the return you wish to e-file.
- In the Income Tax menu bar, select E-file > Submission.
- Monitor e-file status.
- On the Income Tax menu bar, select E-file > Status.
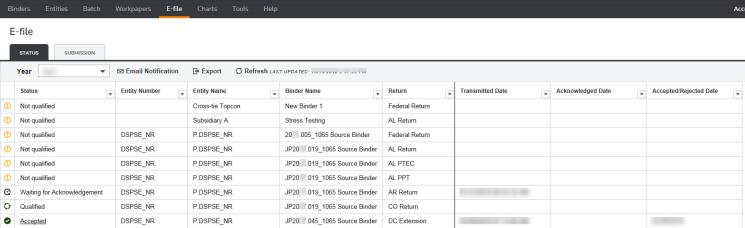
- Select the Year from the drop-down list. The system generates a list on the screen.
- The report shows the returns that have e-file XMLs for the selected year. To see a different year, select the year from the year drop-down list at the top.
- Use the sort/filter features on each column header (Company, Entity, Binder, Return, Status, Transmission Date, Acceptance Date) to customize the returns you see on the screen. The system maintains all your settings by default.
- You can use the following features to display the information you want to see:
- Click the Refresh button to update status, dates, and time on the report.
- Click Clear Filters to reset the fields.
- Click Export to download the information to an Excel file.
- If a return shows Rejected, Error-Not Submitted, or Conditionally Accepted as the status, click the hyperlink to see the error messages.
- On the Income Tax menu bar, select E-file > Status.
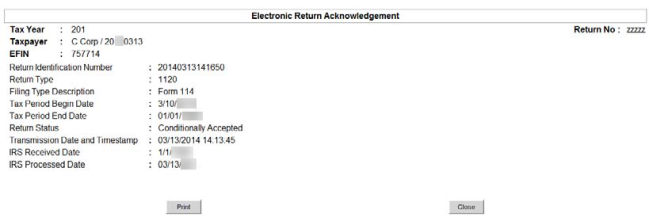
The acknowledgment information is shown on the screen. The BSA Identifier is issued by FinCEN. The BSA Identifier is needed if filing a corrected FBAR.
These messages identify the reason for the rejection. If the situation causing the rejection can be corrected, open the return and modify the errant information. Then repeat the steps to file returns electronically. If the situation causing the rejection cannot be corrected, contact ONESOURCE Support.
E-file/fbar_oit_1.htm/TY2021
Last Modified: 08/10/2021
Last System Build: 08/30/2022
©2021-2022 Thomson Reuters/Tax & Accounting.
