Tax Application Navigation: Organizer Data Entry
We will now go over some basic tips to help optimize your data entry performance.
To temporarily hide the Forms List Window and maximize the Forms Window on the right, click the right arrow between the Forms List and the Forms Window.
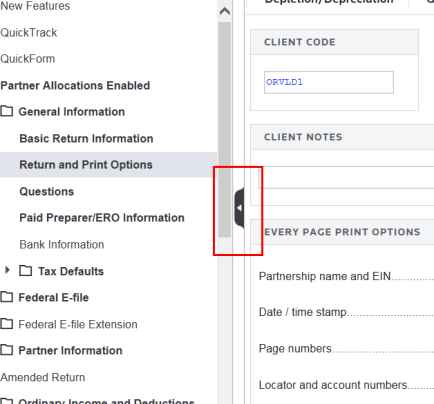
To restore the Forms List, click the right arrow again.
The Organizer forms are designed to facilitate the input process. All data entered in the Organizer flows through a return wherever the data is applicable. Also, the prior year’s information is proforma’d into the Organizer. Because the Organizer is the lowest level of detail, it is the recommended place for data entry.
 Use the Previous in History and Next in History icons to navigate between forms.
Click the History item to see and select from a list of history items.
Certain fields require you to enter data to complete a form. These mandatory fields are clearly marked on the screen as Mandatory.
You must make an entry in the mandatory field before making other entries on that Organizer screen.
![]()
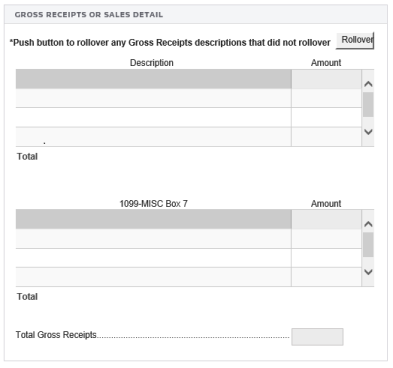
If detail is required on a form for a particular line item, the Organizer provides a repeating data field to enter this detail. You can insert or delete lines anywhere in the group to keep your data in a certain order. The group total automatically calculates and carries to the appropriate forms and schedules. The detail prints on a whitepaper statement to accompany the return.
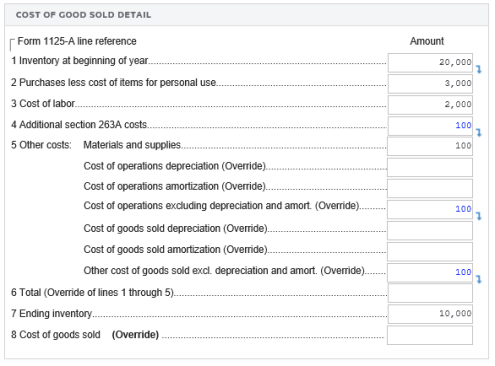
If you need more lines to insert data, move to an unused line and enter the data.
You can delete a line just as easily. Move the focus to the line you want to delete, and delete the information. Many fields can only be deleted using the navigation tree.
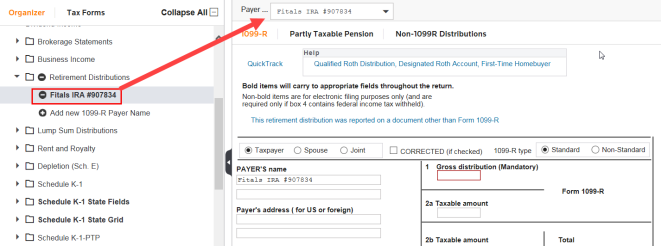
You can add items to some folders. In this example, select Retirement Distributions and select Add New 1099-R Payer Name. Enter a description for the new item in the field, and click Save.
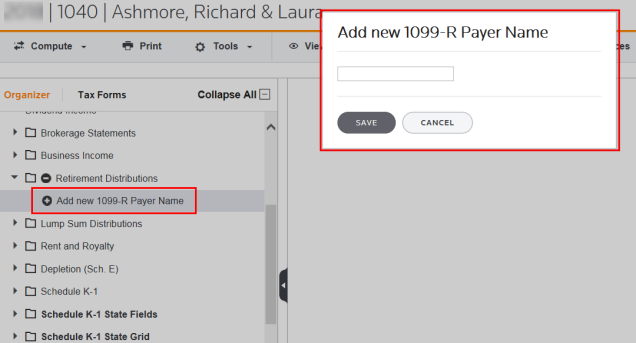
After the item is added, it appears in the Forms List Window as well as in the drop-down list in the Forms Window, so it is easily accessible.
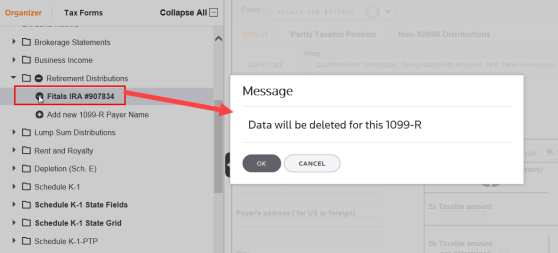
You can delete items in the Forms List Window by clicking the negative icon next to the item. You will receive a confirmation message before the item is deleted.
Tutorials/taxnav_org_data_entry.htm/TY2019
Last Modified: 08/13/2020
Last System Build: 06/18/2021
©2019-2020 Thomson Reuters/Tax & Accounting.
